Home Assistant – Remote Access with Cloudflare (DNS vs Tunnel)
- 30 de setembro de 2025

When we talk about smart home/home automation, we can’t ignore the convenience of accessing everything while away from home. Imagine being on a trip and wanting to open the door for someone, or adjusting the air conditioning before arriving home, checking cameras, or simply turning off the light you forgot on. All of this seems simple, but there’s a complication when using Home Assistant, as by default it only works within the local network.
There are several ways to solve this. The most traditional is to open a port on the router and use DuckDNS (if you don’t have a fixed IP) with Let’s Encrypt. It works, but there are two downsides to all this: first, it’s less secure and won’t work if your ISP uses CGNAT. Another option is to use VPN. Great security, but not practical, you always need to connect manually. The simplest option in this case would be Nabu Casa, many people end up choosing it, but it costs US$65/year. The good side is that it supports the developers, it’s a good alternative, but it’s not free.
And that’s where other solutions come in, such as Cloudflare Tunnel. It creates a secure tunnel, without needing to open ports on the router and integrates with Google and Alexa. Best of all, you can use it for free.
Using Cloudflare brings two options, one that is traditional, pointing only the DNS and the other using tunnel.
Option 1 – Cloudflare as DNS only
In practice, it’s creating an A record in Cloudflare pointing to your home’s public IP:
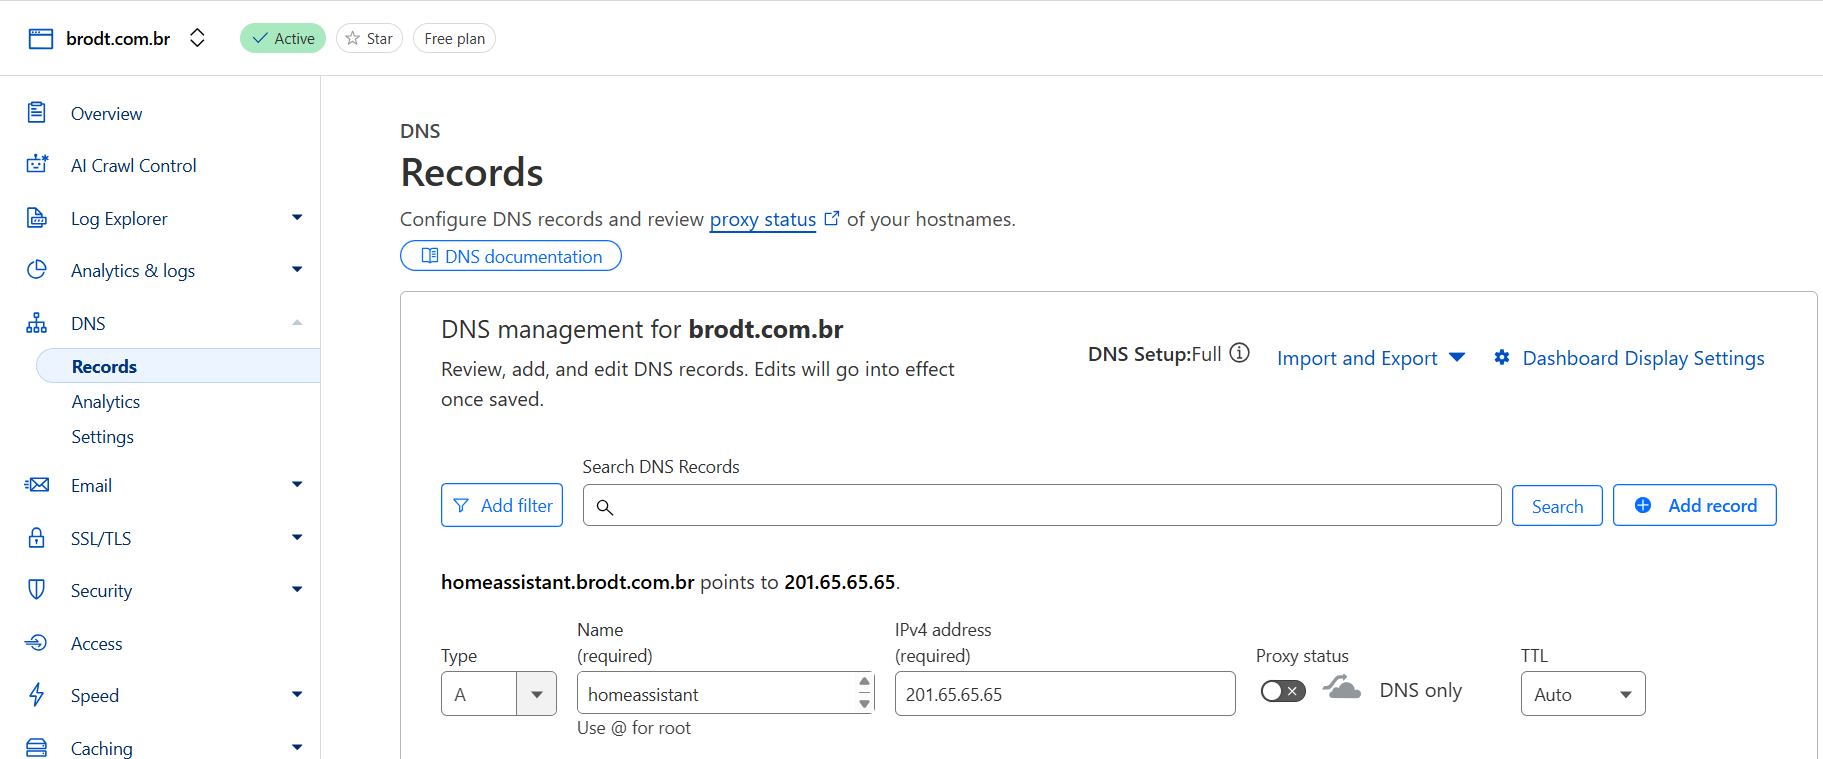
The next step is to open ports on the modem/router (443 to 8123) and redirect to the machine running Home Assistant. It works, but has limitations:
- If your ISP uses CGNAT, it won’t work.
- You’re exposing your network directly, which opens security vulnerabilities.
- You need to keep the port open and hope that nobody decides to try to invade your network.
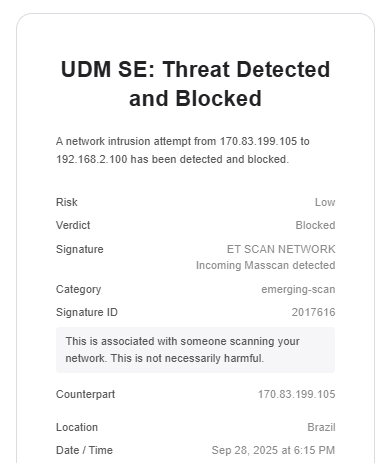
As you can see, despite being the most old-school way, it’s not very secure and recommended. Constantly my UDM-SE blocks various access attempts and scans.
Option 2 – Cloudflare Tunnel
Here’s the modern magic. Instead of opening ports, Home Assistant creates an outbound tunnel with Cloudflare. The setup process is simple:
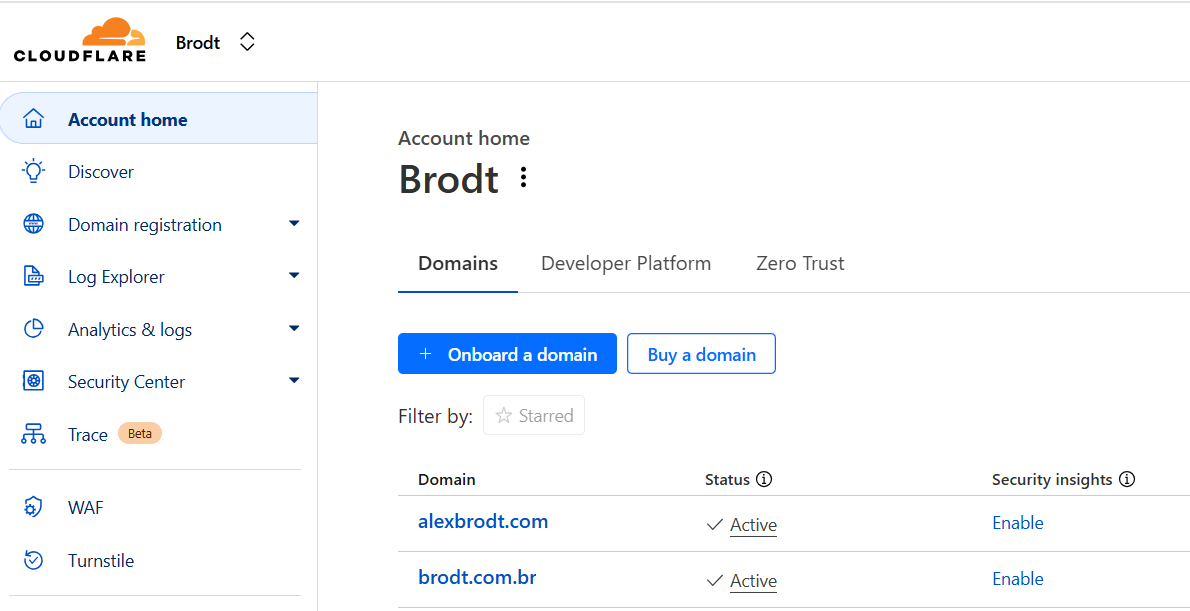
Create an account and add your domain to Cloudflare As I mentioned, you can create your account for free and put your domain on Cloudflare, as well as buy one directly through Cloudflare’s domain system. In fact, it was one of the most affordable options I found for .com domains, prices vary but seemed more affordable than on other registration sites.
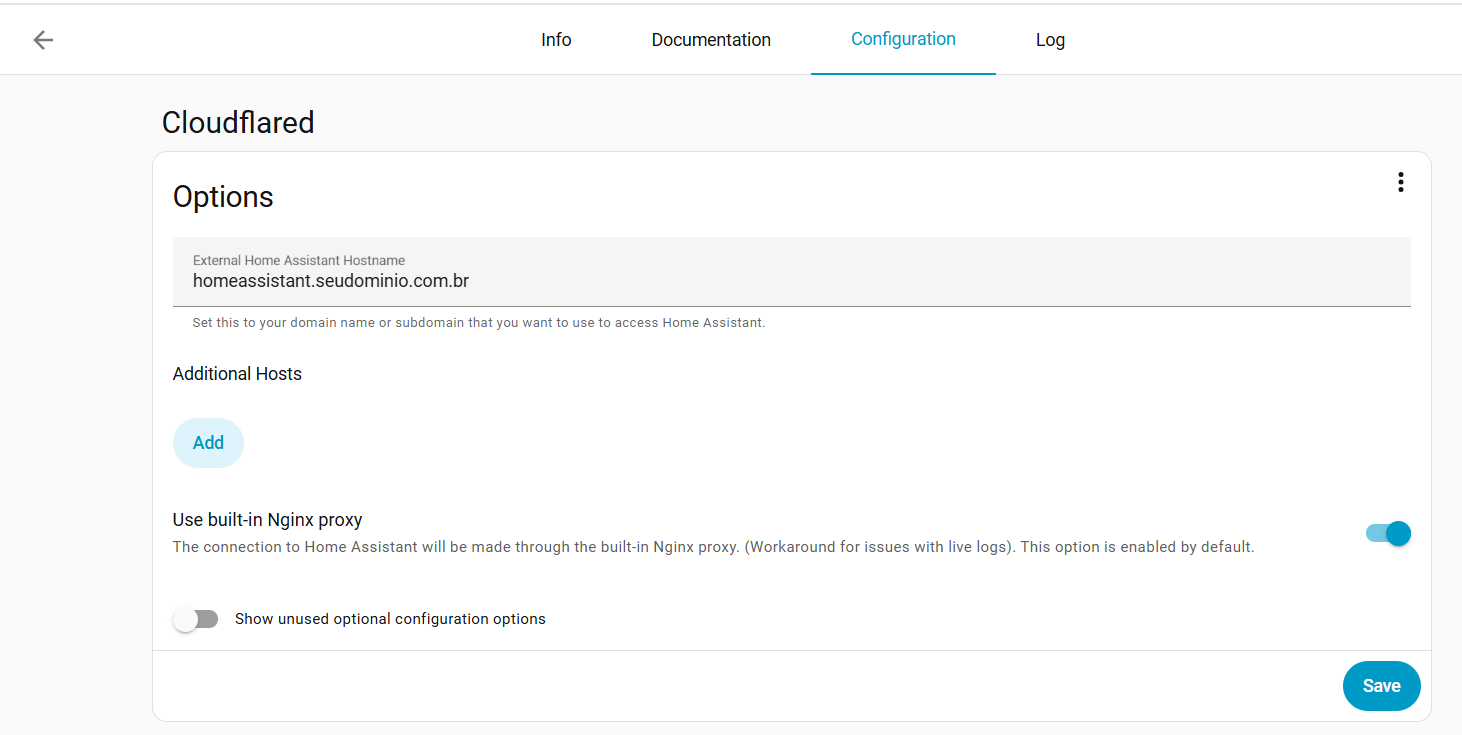
Install the Cloudflared add-on in Home Assistant Here’s the key to all this magic. The Cloudflared plugin. To install the plugin access this link it will make you add the repository automagically and install it in your Home Assistant.
Configure the addon and authorize the tunnel After installing the addon, you need to go to the settings and add your domain.
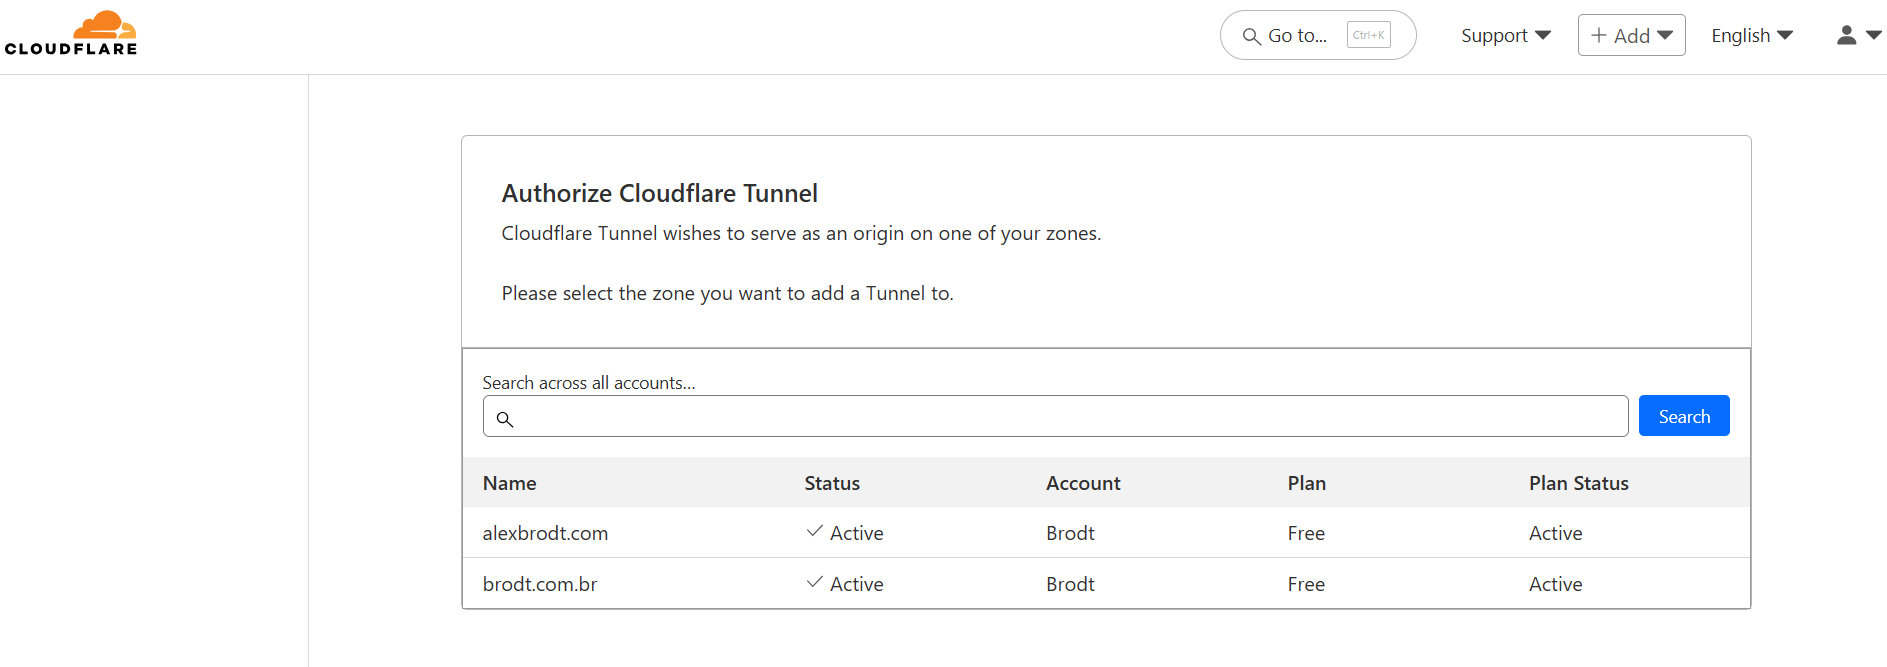
After saving, run the addon, check the logs, as it will have the link to authorize the tunnel. When accessing the URL, you will be directed to authorize your domain to the Cloudflare tunnel.
The add-on automatically creates a CNAME (e.g. homeassistant.yourdomain.com) that points to the tunnel.
Example of add-on logs during configuration:
[16:06:47] INFO: Checking add-on config...
[16:06:47] NOTICE: No certificate found
[16:06:47] INFO: Creating new certificate...
...
Created tunnel homeassistant with id eb621545-4ced-5527-6615-399c029ce985
[16:07:59] INFO: Finished setting up the Cloudflare Tunnel
[16:07:59] INFO: Connecting Cloudflare Tunnel...
2025-09-30T19:08:01Z INF Registered tunnel connection location=gru18 protocol=quic
2025-09-30T19:08:04Z INF Registered tunnel connection location=gru07 protocol=quic
Now it’s time to make a small configuration in configuration.yaml:
http:
  server_port: 8123
  ssl_certificate: /ssl/fullchain.pem
  ssl_key: /ssl/privkey.pem
  ip_ban_enabled: true
  login_attempts_threshold: 5
In the end, your domain (homeassistant.yourdomain.com) already points to the tunnel and is configured, ready for testing.
Check internal and external access to make sure everything went well.
Comparing the two options
-
DNS + Port Forwarding Simple to understand Direct exposure of IP and ports Depends on not being behind CGNAT More vulnerable
-
Cloudflare Tunnel Doesn’t open ports on the router Works even with CGNAT More secure (outbound-only traffic, encrypted) Free (only pay for the domain)
If the idea is convenience and security, the Tunnel is the natural path. The pure DNS mode only makes sense if you already have everything configured and understand the risks well. To avoid IP and port exposure, I recently migrated from the traditional DNS model to the tunnel, everything has gone well so far!